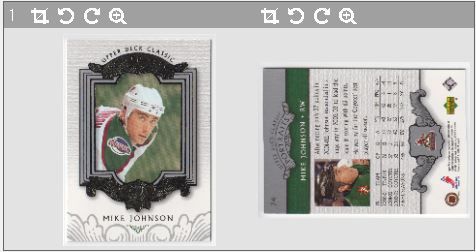
This article explains all of the possible user interactions on the screen. The user interface is made up of 3 main sections : "Front", "Back" and "Results"

- Identified cards are contoured by a changing color line and have an orange circle. The number in that circle refers to the corresponding result.
- Clicking an identified card will select it in the result section
- First button, camera, let you redo the scan of the front if you are not satisfied. It could be because a card moved a little bit when you closed the lid or some cards were not detected and you want to try with a different background (more on that later)
- The 3 next buttons are toggle buttons that apply the same rotation (-90, 180 or +90) to each identified card of the front scan. The selected button will become highlighted (inverted colors). Select a rotation and want to cancel it? Click on the highlighted rotation button it will revert to normal.
- 4 first buttons are the same as Front but act on back
- The last button is the "Album" mode toggle button. You must activate it if you want to scan cards that are in a binder page. It correctly matches the right back with the right front when you flip the binder page.


Features of the Results section
The results section present the identified cards with fronts and backs side by side. It is those images that will be saved when you click on the "Save button" at the bottom of the screen. Use keyboard arrow keys to quickly navigate in results.

- The first button expands (or contracts if expanded) the "Results" section to make it occupy all the screen.
- The two next buttons: Add / Remove. They allow you to add a card that the software was unable to detect or remove a false card that the software wrongly detected. The add button wil add an empty card at the end of the results : you will have to do the cropping yourself (explained later in this page). The remove button will remove the currently selected card (the selected card is the one in the results section that have a background half orange and half dark grey)
- The next button offers help
- Each front and back image of the results have 4 buttons. 2 are for the rotation : the first one rotates 90 degrees left and the second one rotates 90 degrees to the right. Unlike the front and back sections those rotation are not toggles : they are cumulative : click twice on the rotate left button and you will have a 180 degrees rotation.
- The Crop buttons activate the crop mode windows while the Zoom button activates the Zoom window.
Manual cropping (crop window)
Example of bad corners detection. One page of an album was scanned. Cards have a white border and the scanner background is of a similar white : The detected corners are not those of the card. Here you have 2 choices : Rescan with a uniform dark color background or adjust the cropping.
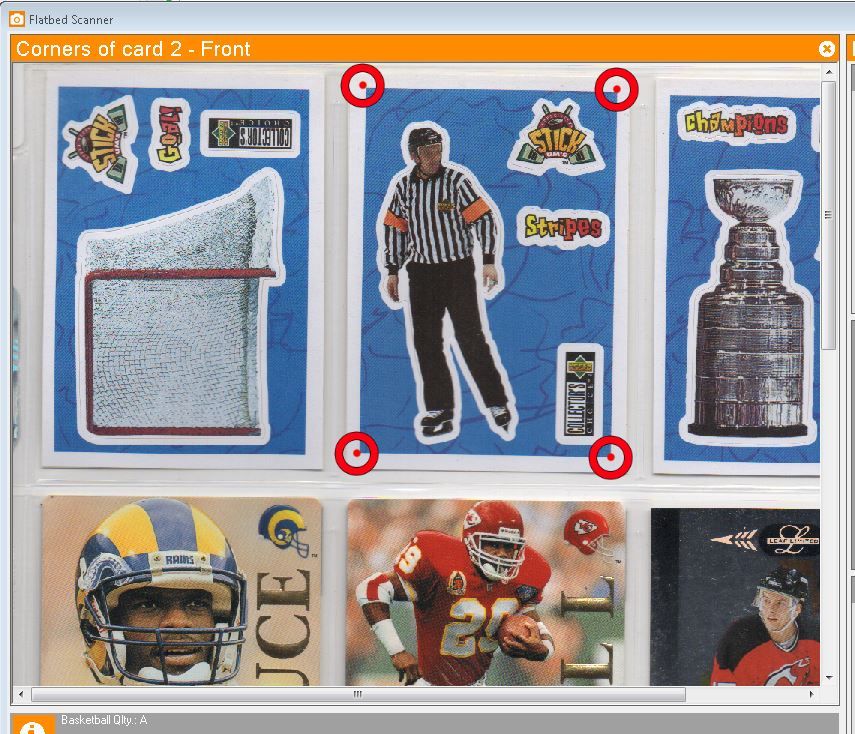
When you activate the crop window it will show 4 red circles that you must place so that each corner of the card is in the middle of a circle.
- Use the mouse wheel to zoom-in / zoom-out (click on the image before so it has the focus or else the results section will scroll)
- To move the scanned image while zommed : click and hold with the left mouse button when not over one of the circle.
- The initial positions of the circles is one of :
- The positions of detected corners if a card has been detected.
- The positions of detected corners on the other side if a card has been detected on the other side (ie: transposition of front coordinates to back picture or vice-versa)
- The center of the scanner raw image if no cards were detected or if you used the (+) button
- To move a circle : click and hold with the left mouse button over one of the circle. Release the mouse button to confirm the position.
- To crop another card click on it in the results section or use your keyboard arrows keys
- To end cropping session click on (x) button
The zoom window
The zoom window shows one card’s front or back at a time
The see the image of another front or back click on it in the Results section or use keyboard arrows keys.
- To end the zoom window click its close (x) button
- You can do individual rotations while the zoom is active
The bottom section

Change the common characteristics of the cards you are scanning. All information you enter here will be applied to the cards when you save them. As an example If you scan 8 cards of the same set you will save time entering the set fields (year, product, set) only once.

Location of the cards. We developed a strategy to quickly retrieve cards stored in boxes. This will be explained later in another tutorial.

This is where you click to save the results, but you cannot do so until each element of the results have a front and back image.
Was this article helpful?
That’s Great!
Thank you for your feedback
Sorry! We couldn't be helpful
Thank you for your feedback
Feedback sent
We appreciate your effort and will try to fix the article