Sometimes, using a scanner is not your best option or for others maybe your scanner is not supported by Kronocard directly. So if you already have your card images front and back on your computer at 300dpi you can import them into Kronocard. You can load that module the same way that you start scanning cards. In Kronocard you click on the camera icon on the left and the one at the top. In the scanner list select Import Photos.
Here is an animated picture of how it's working:
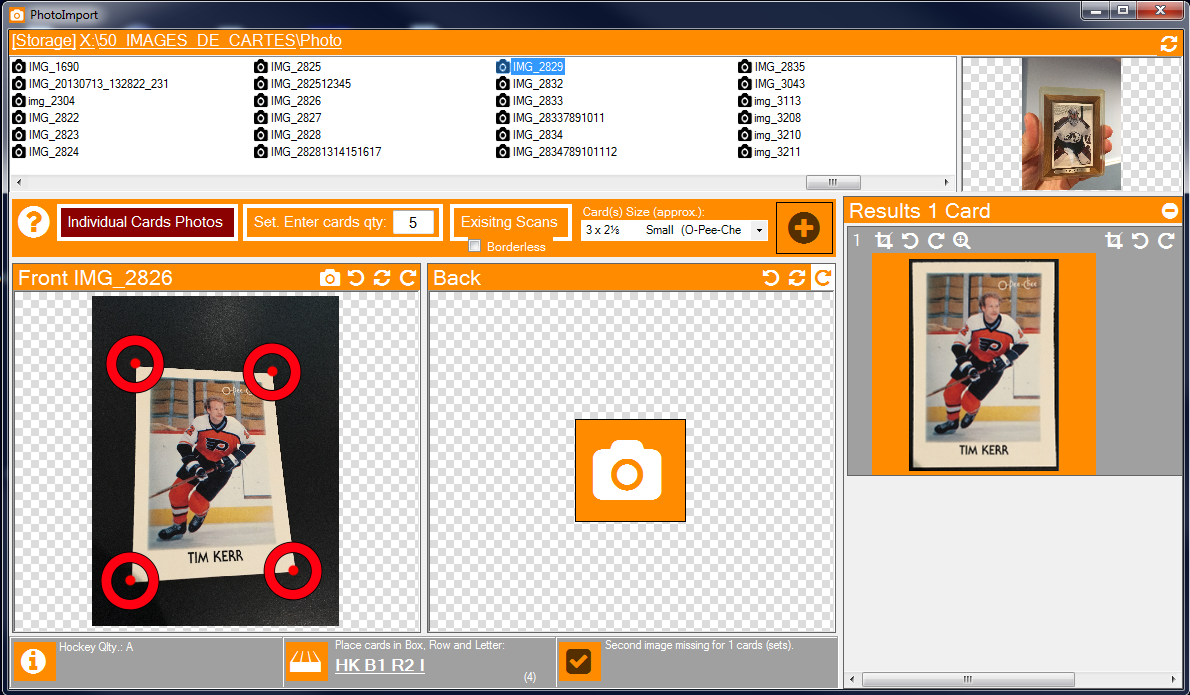
Wow! What we have here? A package of exciting features :)
The top section allows you to choose which photo file you want to import and there is a preview on the right. As seen in the animation, when the selected photo is imported the software will automatically selects the next photo file, so it is ready to be imported too.
When a picture is imported, Kronocard automatically detects the corners and performs deskew it. Of course if ever Kronocard is unable to correctly detect the corners you can adjust it using the little red targets.
You also have a zoom button that allows you to preview the resulting images.
There are three mode to import photos.
- Import individual cards photos
- Import photos of set of cards
- Import existing scans of individual cards
In each mode you have to provide front and back pictures for each card or set. Pictures to import must be in jpeg format.
Import individual cards photos
Select this first mode to import pictures of individual card taken from a camera, cell phone or tablet. You will need a picture of both the front and the back.
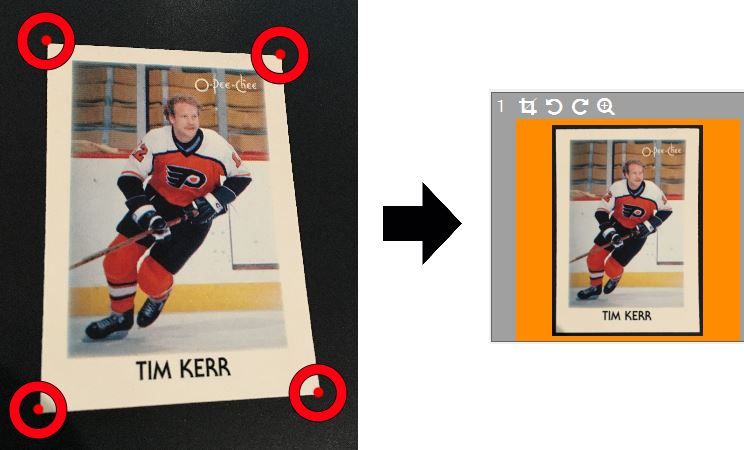
The import individual cards photos mode automatically straightens the pictures to correct perspective effects.
Kronoscan will attempt to detect the corners of the card automatically. The success rate will be much higher if your card stands on a surface of uniform colour that contrasts with the card border colour. As an example, a grading case is easy to detect over a dark background.
If the corner detection fails, then manually move the red targets over the corners of the card: You have to click on a target and maintain the mouse button pressed. Release the mouse button to confirm the new target position.
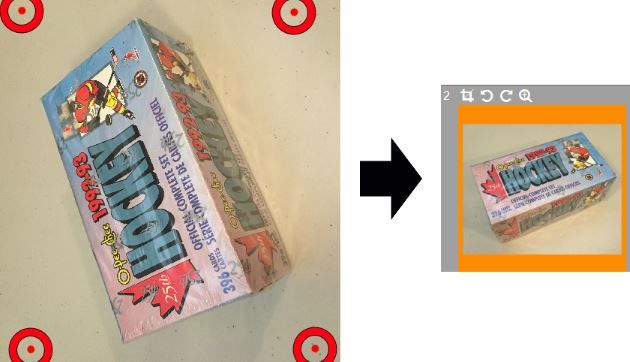
Import photos of a set of cards
This second mode is intended for selling a set of cards in one transaction. You must specify the number of cards in the set. To retain the compatibility with our existing tools, you must provide exactly two pictures of the same set.
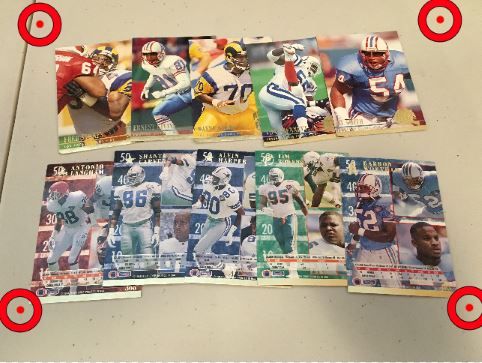
There is no automatic cropping for pictures of set. However manual cropping is available by moving the red targets with the mouse.
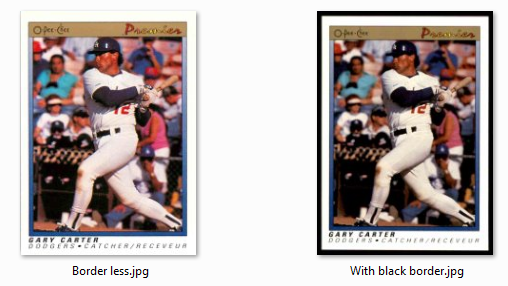
Import existing scans of individual cards
This third and last mode is intended to import existing scans of individual cards. Front and back scans are required. Usually, buyers like to see the card borders. However, it is possible that your existing scans do not include an external border.
When this is the case, use the borderless option. When that option is selected Kronoscan will not attempt to identify the card corners to redo the cropping automatically.
Approximative card(s) size
You must specify the approximative size of the card because:
It corrects the aspect ratio errors caused by the perspective for individual pictures of cards. It's also defines the final size of the image in Kronocard.
The size of cards is a piece of information shown to buyers on kronozio.com and eBay.com
TIPS: To go faster, you can use the keyboard spacebar instead of clicking on the big camera buttons. Each spacebar tap will load the next available file image in your list.
Was this article helpful?
That’s Great!
Thank you for your feedback
Sorry! We couldn't be helpful
Thank you for your feedback
Feedback sent
We appreciate your effort and will try to fix the article